Hi Guy!
Today I will show you how to build a wicker basket for miniatures and scenes up to 45mm scale.
There you go!
What you need:
- a mosquito net ( you can find it in most hardware stores)
- steel thread 0,8 mm
- tweezers
- a pair of scissors
- superglue
Step 1: Preparation
First we figure out the dimensions of the wicker chest we are going to build.
Then we cut the mosquito net.
Leave some margin in the upper side.
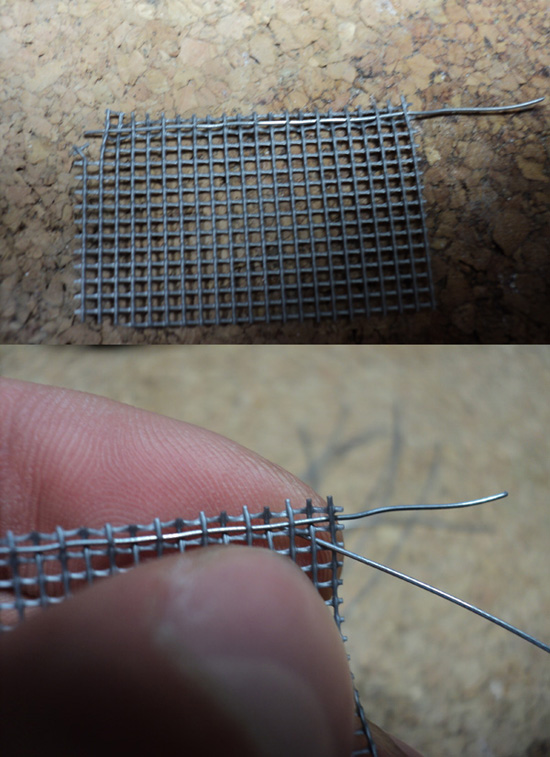
the one in this picture is 3,5 cm width, 2,3 cm height
Then we cut the mosquito net.
We cut the thread as needed.
My chest was meant to be 1 cm in height, so I cut seven pieces 5cm long.
This let me handle the thread easily while I pass it through the threads in the net.
Step 2: Knitting
We start inserting the thread alterning one hole with another, just like knitting.
As you progrees to the fifth hole it will be much harder to pull the thread. You risk to sting your fingers.
The solution is this: we bend the net so that the thread can easily be inserted, alterning the bending, just like a wave.
It's simple, isn't it?
Once you do it this way you will quickly complete one row.
That being said, we start the other row, but this time we start in the opposite side of the net, so to make a criss-cross pattern. Pictureeeeee!!!
We will repeat the process bending the net to let easily pass the thread.
Don't worry to bend the net with the threads already in position.
Net are really resistent, more than what u could image.
Keep repeating the process.
This is how it looks on the fourth thread.
And this is on the seventh and last thread.
And now the side of the wicker chest is complete.
Step 3: Shaping the basket
Now we cut the excesses leaving the end as long as possible.
We bend the side so t ogive shape to the basket using tweezers to help yourself.
The nice thing about using steel thread is that intertwining the ends will give more resistance to the structure.
Step 4: the bottom
Every respectable basket has a bottom..
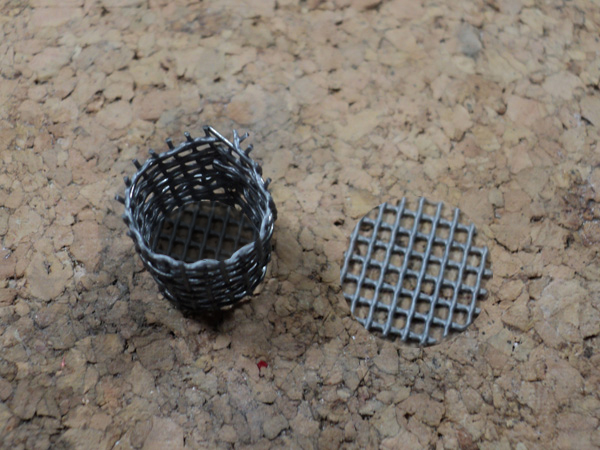
So now, we take the basket and measure the bottom circumference.
Cut the net using scissor and make a circle slightly larger.
Put the bottom net on top of the basket and with a pen o some other object push it gently to the bottom, making sure that it fits with the plastic ends to drops in our basket.
We take a toothpick and with some superglue, put a drop or two so we will strengthen areas of joint between the basket and the bottom part.
Let it set for 5 minutes. That is the result.
Now we are almost at the end.
Step 5: Cover
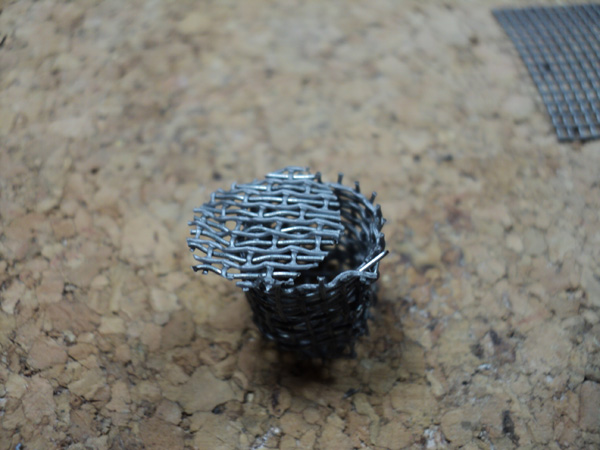
Now that the bottom is done we shall make the cover.
So take my follow one just as example and feel free to experiment.
Cut a square in the net slightly larger than the circumference.
We use the thread and repeat the knitting process like in Step 2.
After that we cut the square in a circle in the same circumference of the basket and the cover is done.
I used some chiropractor needles to make the handle but you can really use other things to simulate it.
AND THE WICKER BASKET IS DONE AND READY TO BE USED!
Remember, I show how I make wicker basket but feel free to fit it how you prefer.
Please! TRY THIS AT HOME AND ENJOY!
Thank you for reading and see you soon with new tutorials.
Cheers!
Cesare "Trevis_11" Trevisiol
Article and Pics by: Cesare "Trevis_11" Trevisiol
Translation by: Andrea "Kraan" Buratta


0 commenti:
Posta un commento